Make a Block-Stacking Game with Construct 3

By Caleb Cornett
Introduction
Construct 3 is a powerful and easy-to-use game engine that empowers you to make all kinds of fun games.
Construct 3 is an all-in-one game development tool, meaning it has a built-in programming interface, level editor, and art program. Once you've created your masterpiece you can publish it to the web, desktop (Windows, macOS, Linux), mobile devices (iOS, Android) or even the Xbox One!
One of the best features of Construct 3 is that it runs entirely in the web browser -- no need to download and install anything! It supports all major browsers (such as Chrome, Safari, and Firefox) and can even be used from smartphones and tablets.
Some of Construct's more advanced features require you to purchase a subscription, but don't worry; there's a free trial version that still allows you to build really interesting games at no cost. That's the version that we will be using in this tutorial.
What are we making?
When you were a little kid, did you ever play with blocks? Wood blocks, foam blocks, building blocks... No matter your age, making towers (and knocking them down) never gets old!
In this tutorial, we will make a simple (but very entertaining) game about stacking blocks and knocking them down. This screenshot will give you an idea of the finished product:
Before we dive into the Construct editor, let's think about how we want to approach the design of this game. There are 2 major parts to the game...
- The floor. We need a ground level for our construction, or we won't be able to accomplish much of anything. Without a floor, our blocks would just fall endlessly into the virtual abyss. Yikes!
- The blocks. Duh. There's a lot to these blocks, though, so let's break it down...
- The player can left-click to create a new block where their cursor is pointing.
- The player can right-click an existing block to remove it.
- Each block will have a randomly-selected color.
- Blocks will have semi-realistic 2D physics, meaning that they will fall due to gravity and stop when they hit the ground (or another block). If one block hits another at the right angle, it can knock down the other block and/or itself.
- When a block is removed (via right-clicking it), any blocks on top of it will fall down.
That's about it! Like I said before, this is a very simple game, but that simplicity makes it a really great starting point for learning Construct 3. Plus, there's plenty of room for creativity in the development of the game, as you'll no doubt see by the end. I hope by the time you complete this tutorial, you'll have a game you feel very proud of.
All right, it's finally time to open up Construct 3 and get started! In the words of a famous Italian plumber, "Let's-a-go!"
Step 1. Create the Project
First things first, in a new tab or window, open up the Construct 3 Editor. When you get there, you should see something like this:
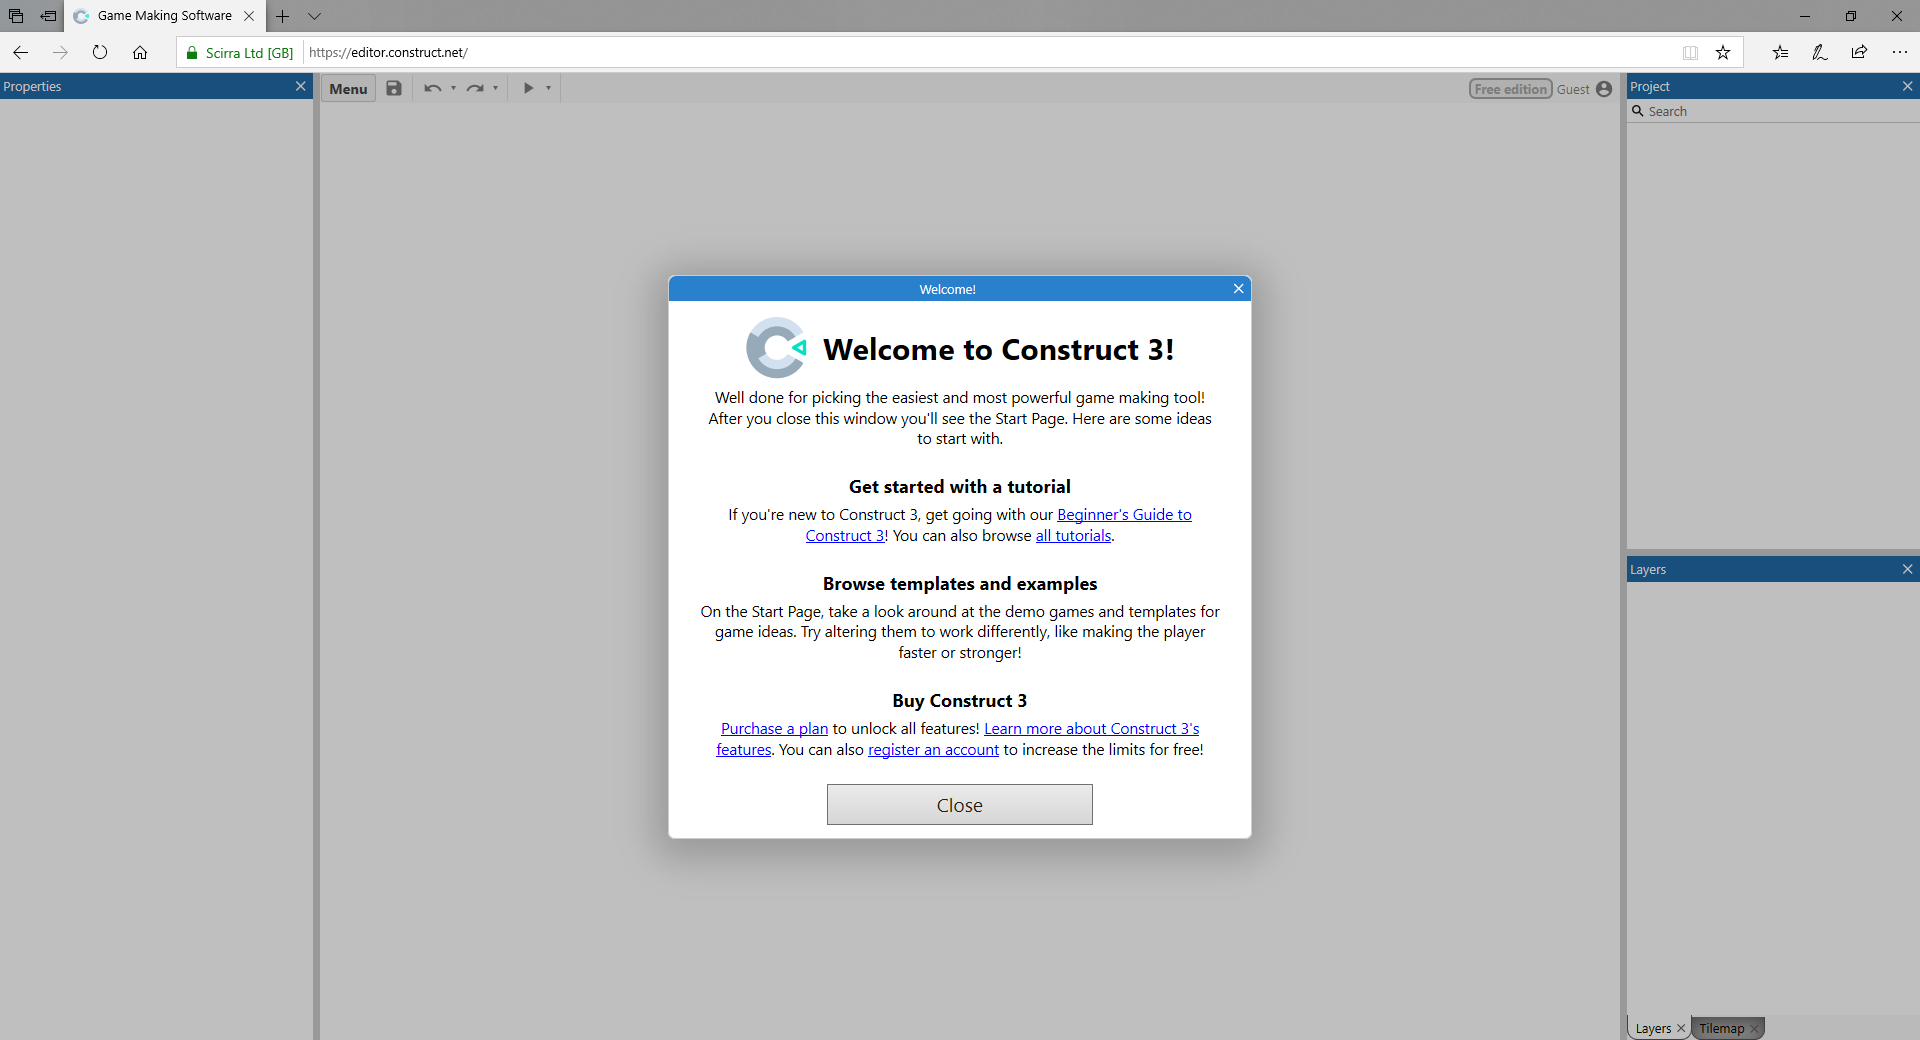
Go ahead and close the Welcome window, either by pressing the X in the top-right corner or clicking the Close button. You will then be greeted by the Start Page of Construct 3:

I have highlighted the most important parts of the screen with color-coordinated arrows and boxes. Let's quickly go through them...
RED: The NEW PROJECT button is super important! You'll never guess what it does! (Spoiler: it makes a new project.) More specifically, it opens up a new window that lets us give Construct some info about the kind of project we want to make. We'll get to that in just a moment, when we actually create the project for our game...
ORANGE: These handy buttons allow us to load projects we've saved previously. That way we can pick back up where we left off. You may have noticed that there are three different buttons. That's because Construct 3 lets you save your projects to three different places: the Cloud (meaning your personal Dropbox or Google Drive), the Browser (a special storage area in your web browser), and as a File which you then download onto your computer. There are pros and cons to each of these storage locations, which we'll discuss in a bit.
BLUE: Construct 3 comes with a number of sample projects to help you learn how to use certain features or give you inspiration for making your own games! On the left, you can switch between categories (such as "Game Demos" and "Beginner Examples") and the samples will appear in the list on the right. From there you can click Open Project on a sample to open it in the Construct 3 editor. You can inspect the code, play the game, and even make your own modifications to it!
PURPLE: This button will take you to the Manual, which is by far the most important resource available for learning Construct 3. The Manual has helpful information about everything in Construct, from the very basics to the most advanced features. Consult it often, both when you're stuck and when you're bored -- you might learn some cool stuff just from browsing through it!
The other stuff on this Start page is useful too, but those are the most important things for you to know about!
Anyway, let's get on with creating our project. Click New Project and you should see the New Project window pop up:
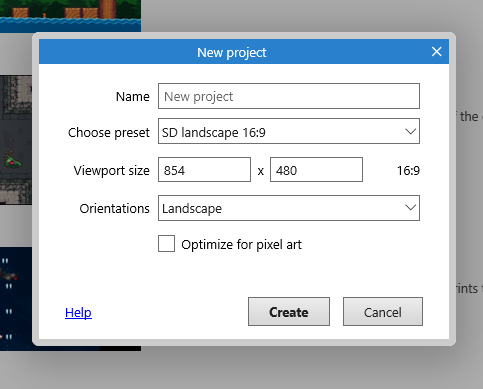
There are several options we choose from for our new project, but for now let's just stick with the defaults. The only thing we want to change is the Name. Change it to something like "Block Stacker", then hit Create. You should be then be transported to a new interface. Congratulations, you made a project!
Step 2. Layout Setup
Welcome to the Layout Editor! This is where you will be creating your levels, arranging your objects, changing your game's settings, and much more. It can be a bit confusing at first, so let's look it over.
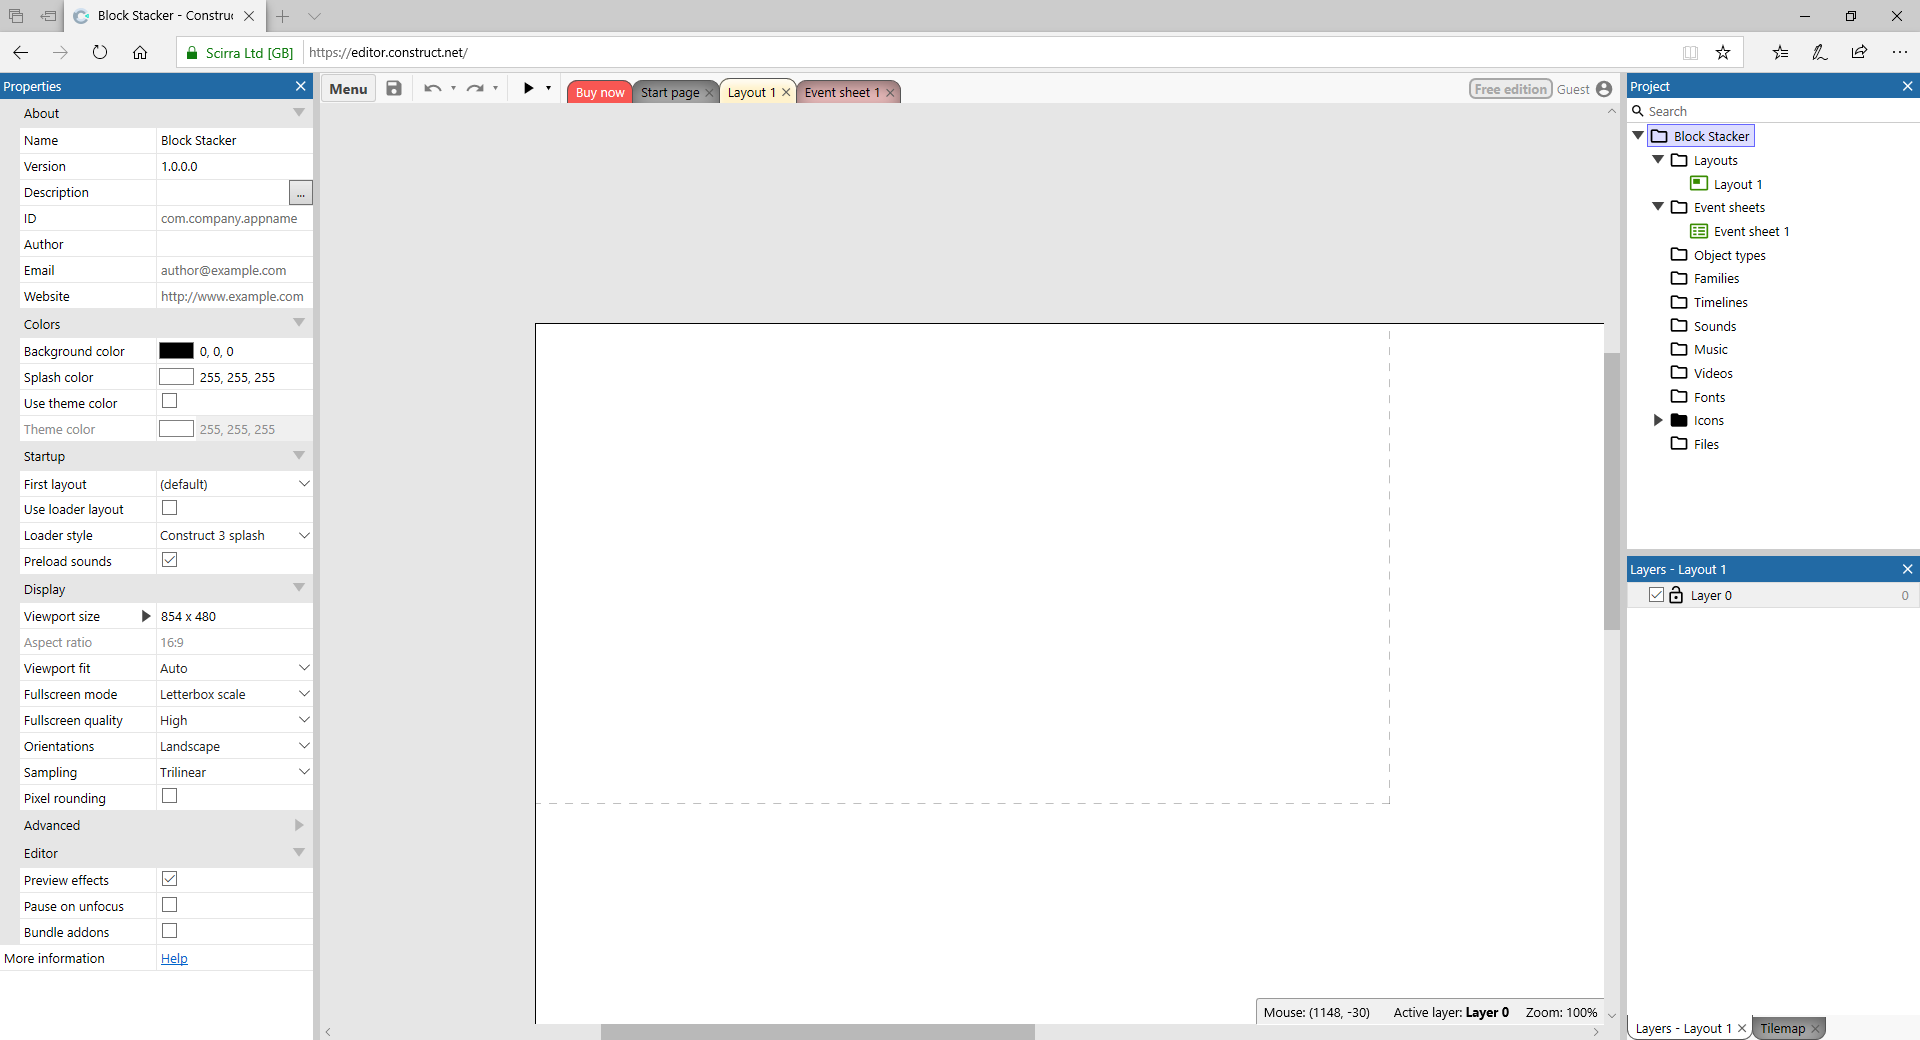
That tall panel on the left is the Properties window. It contains data about whatever happens to be selected at the moment -- it could be general game settings (like in the screenshot), info about the size of the game world, or properties of a selected object in the world. We'll be using this a lot so take a moment to look it over! Try clicking somewhere in the middle of the screen and see how it changes.
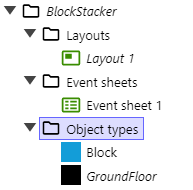
Over on the far right, we have the Project window. This shows you all of the pieces and parts that make up your game, such as levels, object types, sound effects, and sprites. Quite handy if you're trying to find something!
Directly below it is the Layers window. Layers are used for positioning objects in front of or behind each other. We won't use them in this tutorial, but it's good to know about them!
Up at the very top-middle of the screen (right underneath the browser address bar) is a bunch of tabs. You may have noticed these even on the Start page, but there should be a couple new additions: "Layout 1" and "Event sheet 1". You can click on a tab to switch to that interface. We'll be switching between those two tabs quite often as we progress.
And finally, we arrive at that giant area in the middle of the screen with the white rectangle. This is the Layout View. This is where we can place all of our game objects and set up levels.
So what is a Layout exactly? It's essentially a single screen (or scene) of your game. It can be whatever kind of screen you want; main menu, action-packed platforming level, dungeon, options screen, cutscene, you name it! The number of layouts your game needs depends on the kind of game you're making -- some very complex games might even have hundreds of different layouts! Thankfully we're making something much simpler, so we'll just have the one.
All the different objects we'll be using to make our game (ground floor, blocks) will live inside this Layout. The Layout determines their position, size, layer, and all kinds of other information. The Layout Editor is one of Construct's most powerful tools, but it's also quite easy to use!
Let's start by changing the size of our Layout. It's really humongous right now -- in the screenshot above, you can see it's bigger than the whole Layout View! And more importantly, it's way bigger than what we can actually see when playing the game.
See that gray dashed-line box? You can think of that box as a "camera" through which you view the world. Anything outside that box will be invisible to the player, unless you add a scrolling camera feature to the game. But we'll save that for another time...
Left-click anywhere in the Layout View to set the left-hand Properties window to contain info about the Layout. It should now look like this:
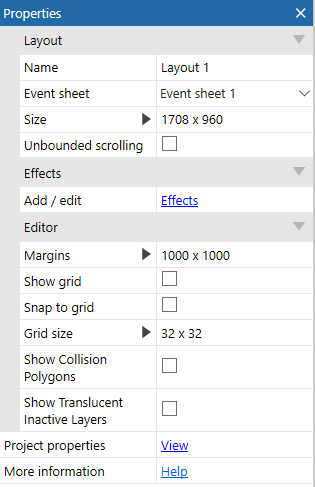
There's a lot of stuff here, but what we're interested in is that Size property. The 1708 x 960 represents how wide (1708) and tall (960) our Layout is, measured in pixels. We want to reduce the width by half and the height by half, so click in the box to the right of Size and type 854 x 480, then hit the Enter / Return key. The Layout should now look like this:
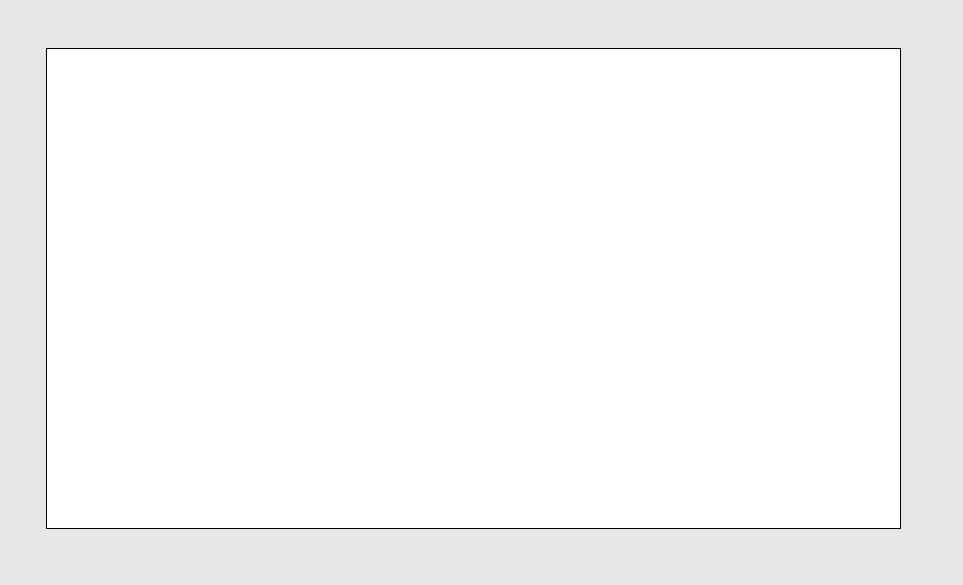
That's much better! You can't see the gray dashed line anymore, but don't worry; that means the viewable size of the camera matches the size of our Layout. Exactly what we wanted!
Step 3. Create the Ground
Now it's time to make our first game object! Right-click anywhere in the Layout and click Insert new object. A window will open that shows all the built-in objects we can choose from. Take your time and look around at all the options! When you're done browsing, select General > Sprite and in the Name field, give it the name "GroundFloor":
![]()
The Sprite is an extremely versatile object type that we'll use for both the ground floor and the blocks. It allows us to draw (or upload) an image that will represent the object, and we can program it to do all kinds of things.
Click the Insert button, and the window will close. Huh? Look closely -- your cursor has changed into a crosshair (or a + sign)! While your cursor is like this, click somewhere in the Layout to place the object there. For now, just click anywhere, we can move it later.
You should then automatically be taken to the Animations Editor:
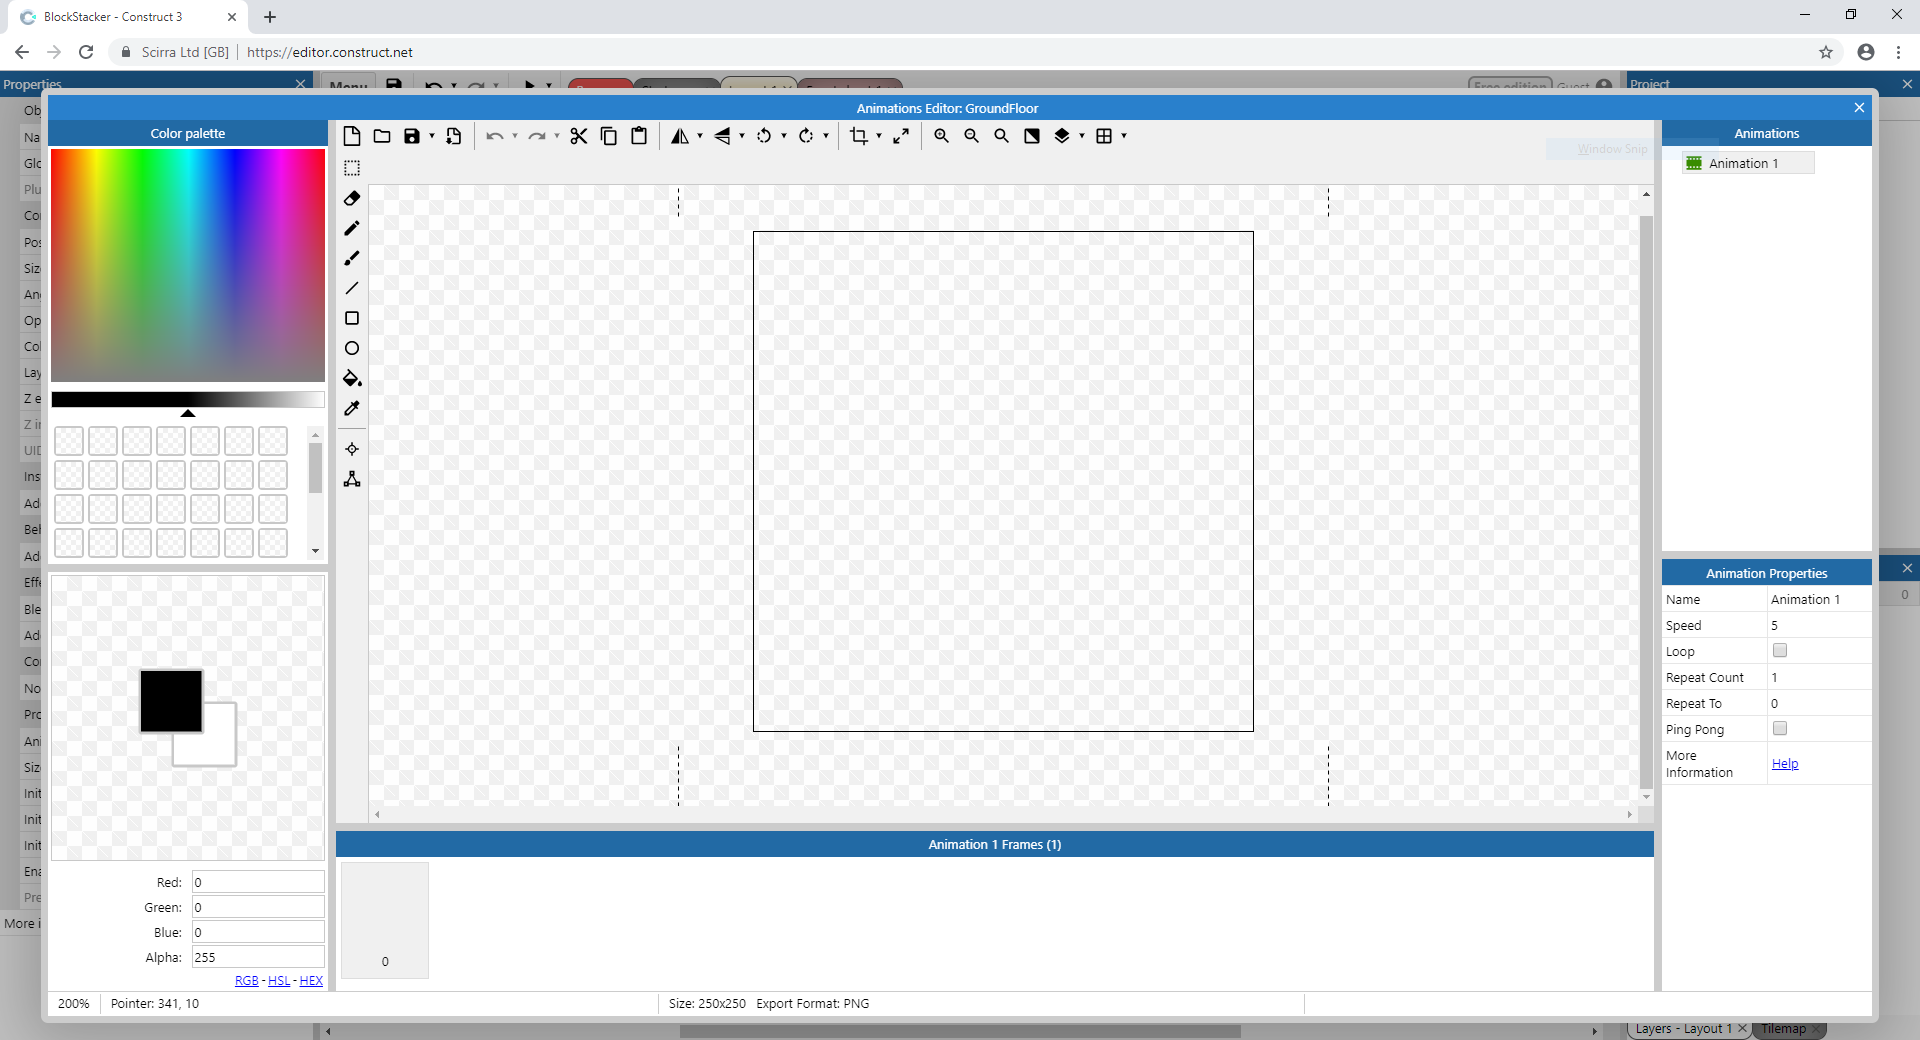
If you've ever used an image-editing tool like MS Paint, GIMP, or Photoshop, you should feel right at home here. We're not going to be doing anything fancy in the editor in this tutorial, but just know that it has a bunch of helpful tools to help you make any kind of artistic masterpiece. (Also worth noting that you can create artwork in other programs and import those images to Construct if you so desire. Up to you!)
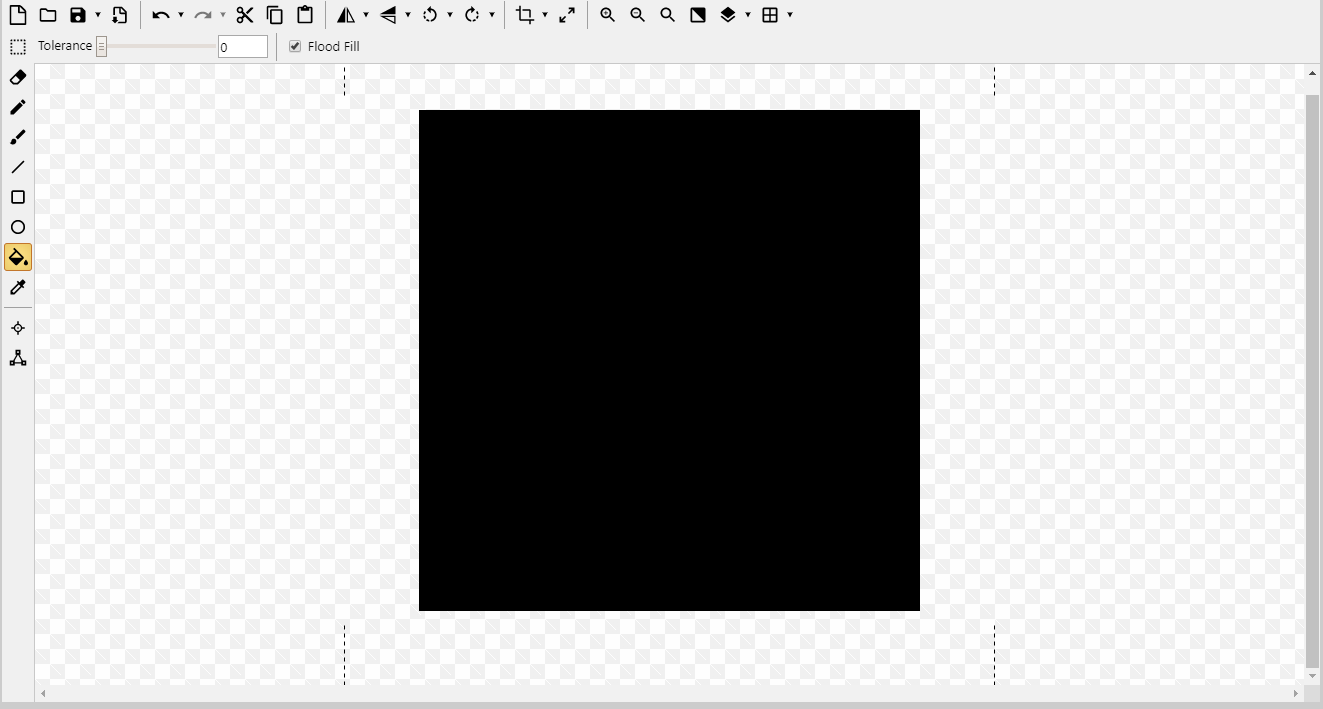
For our ground floor, we don't want it to attract much attention so let's choose a dark color -- either solid black or very, very dark gray. Then select the Fill tool (with the paint bucket icon) and click inside the center square to fill it up.
Once we've got that, we can close the Animations Editor by clicking the X button in the top-right of its window. Now we can behold our creation in the Layout View. But there's a problem: it's really big!
To fix that, click to select the GroundFloor object and, in the Properties window, change its Size to 854 x 30. Now it's the right size, but at the wrong position. Right above the Size property, change its Position to 427, 465. When you're done, it should look like this:
Step 4: Creating the Block
Now let's add our block game object! If you'd like to try this yourself, the steps are exactly the same as when we added the GroundFloor object. The only difference is the sprite color (pick your favorite!) and how we will re-size and re-position it at the end.
To save you some scrolling, here are the steps again:
Right-clickin the Layout View.- Select
Insert new object. - From the "Create new object type" window, select
General > Sprite. - In the
Namefield, enter the name "Block". - Click
Insert. - Click somewhere in the Layout to place the object.
- In the Animations Editor, select your favorite color from the palette.
- Select the
Filltool (paint bucket icon). - Click in the middle square to fill the sprite.
- Click the X in the top-right corner of the Animations Editor to close the window.
Great! With the Block object, the exact position isn't really important, but we do want to shrink the size so we can fit more than just a few blocks onscreen at once. Select the Block and in the Properties window, change the Size to 40 x 40.
Your Layout should now look something like this:
Step 5: Saving + Running the Game
We've made a lot of progress, so we'd better save our work! At the top of the screen, to the left of the tabs, you should see a button called Menu.

Click the button, then navigate to Project > Save As > Save to Local Browser.
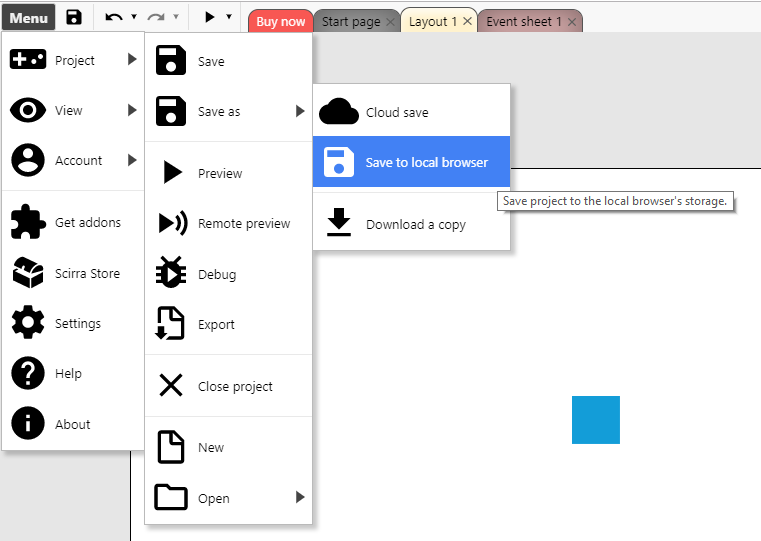
When you click the button, it may ask you about "Enabling permanent local storage". Agree to enable local storage. This means that your browser can contain your saved project without the risk of accidentally deleting it.
Next it will take you to the Save Project window. The filename at the bottom should already have the correct name, so just hit Save. Ta-da! Now that you've saved manually, Construct 3 will auto-save for you every so often. (It's still a good idea to save your project manually, though!)
Now that we've got that out of the way, it's time to finally see our game in action. At the top of the screen, to the right of the Menu button, you should see a Play button (with a triangle icon).
Click Play and your game will appear in a pop-up window! (If you get a warning message about popups, click the menu option most similar to "Allow popups.") You'll quickly see that the game does absolutely nothing at the moment.
We need to make things happen! We need to give the game life! We need to give the game some Behavior.
Step 6: Adding Behaviors
Behaviors are an incredibly powerful feature of Construct 3 that let you quickly add complex and customizable features to an object. Let's dive right in!
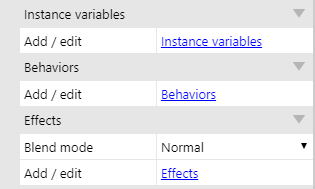
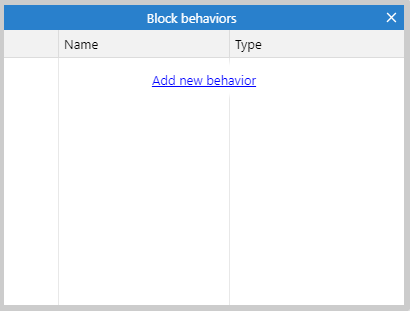
Click to select our Block object. In the middle of the lefthand Properties window you should see a section called "Behaviors". Click the blue Behaviors link, shown in the screenshot below:
A new window will appear that shows all Behaviors currently added to the object. We don't have any yet, so click the Add new behavior link:
Yet another window will open, this one containing all the different Behaviors Construct 3 has to offer. Each of these Behaviors does something unique and interesting. For instance, the Jump Thru Behavior makes the object a "jump-through" platform that's only solid on the top. Great for platformers! Another fun Behavior is Wrap which makes objects that disappear off one side of the screen appear on the opposite side, like in Pac-Man.
However, the Behavior we're most interested in for our Block is the Physics Behavior, shown below:
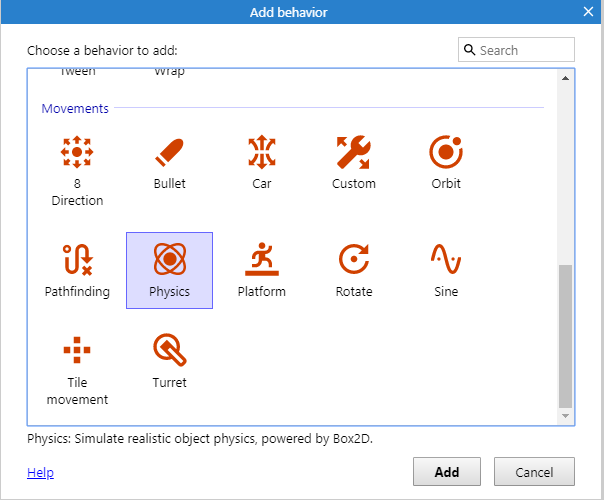
Click Add to give our object this Behavior. Unsurprisingly, the Physics Behavior gives our object "realistic" physics -- without any programming on our part, our block will fall according to gravity, collide with other blocks, and more. (Fun fact: The Physics Behavior actually uses Box2D, the same physics system used for Angry Birds!)
Once you've clicked Add, you should be back to the previous Block behaviors window. Click the X button in the top-right to close it. Now save and run your game by clicking the Play button.
Wow! We have movement! Our Block happily falls down, just like it should... except that it goes through the floor. Whoops.
To fix this problem, we need to give our GroundFloor a Physics Behavior as well. Go ahead and see if you can add it yourself! It's just like what we did for our Block.
If you're having trouble, here's the steps:
Left-clickto select theGroundFloorobject.- In the lefthand
Propertieswindow, click the blueBehaviorslink. - Click
Add new behavior. - Scroll down and select the
PhysicsBehavior. - Click
Add. - Click the X in the top-right corner of the
GroundFloor behaviorswindow.
All right, let's save and run the game again!
...
...
...um, where'd the ground go?
Well, because we gave the GroundFloor a Physics Behavior, it automatically started falling due to gravity. That's not what we want! We want the GroundFloor to stay in place no matter what.
Thankfully, there's an easy fix. Over in the Properties window, you might notice that something new has appeared:

Most Behaviors come with a set of options that we can change to fit our game. We can see all the options for Physics here. We'll explore these more thoroughly when we get back to our Block, but for now, just check the Immovable checkbox. That will make our GroundFloor stay in place no matter what -- exactly what we wanted!
Save and run the game again. You should now see the block fall, bounce slightly, and come to rest on the floor. Wonderful!
Believe it or not, we're now completely finished with the GroundFloor object! We don't need to make any more modifications to it for the rest of the game. Congratulations on reaching this milestone!
Step 7: Experimenting with Block Bounciness
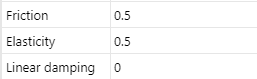
We're at a point now where you can start to experiment with ideas and see how different Physics Behavior options change the feel of the game. Left-click on the Block in the Layout View, and turn your attention to the Behaviors > Physics section of the Properties window.
Take a look at the Elasticity value. It affects how bouncy our Block is. Try setting it to 0, then play the game to see what happens. After that, try setting it to 1.0 or even higher, and see the difference.
I'll leave it up to you to find a value that feels fun for your game! If you're indecisive, just go with 0.5 and you can adjust it as we go along.
Step 8: Adding more blocks
So far our game only has one single block. That's not very fun. Let's change the game so that wherever we left-click in the game, a new block appears!
Since this is unique to our game and not something we can find in a Behavior, we'll need to program it ourselves. The way we do that in Construct 3 is with Event Sheets.
At the top of the screen, among the rest of the tabs, you'll see a tab called Event sheet 1.

Click that tab, and you'll be taken to the Event Sheet editor:
Take a moment to read over the instructions in the middle. Programming in Construct 3 is all about Conditions and Actions. You can think of these in terms of "If Condition, then Action". Some examples:
- "If the character hits a spike, then take damage."
- "If the score is 100, then display a 'You Win!' message."
- "If the left arrow key is pressed, then move the character left."
- "If the character is about to walk into a wall, then make the character stop walking."
It's a very simple concept, but it's at the heart of everything in Construct 3 (and most programming in general). Let's put it into practice!
Our mission is to make it so that when you click in-game, a new block appears there. We can turn that into a Condition and Action like this: "If the user clicks the left mouse button, then make a new block at the place they just clicked."
It turns out that in order to use Mouse-related Conditions in an Event Sheet, we need to add a Mouse object to our game. It's easy to do: in the object list on the upper-right side of the screen, right-click the "Object types" heading:
From the dropdown menu, click Add new object type. In the resulting window, scroll down and click the Mouse object type:
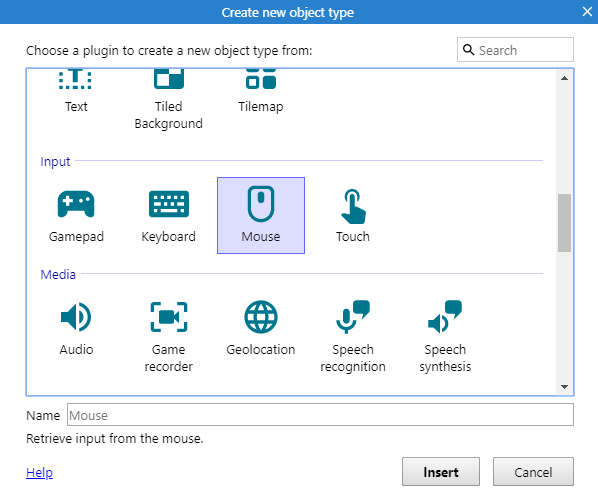
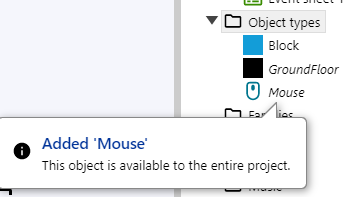
No need to give it a name, just click Insert. You should now see the Mouse object in the list with the others.
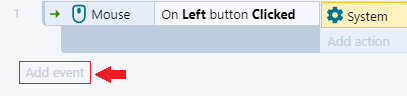
Great! Now, back in the Event Sheet editor, click the Add event link in the top-left corner. You will now see a window like this:
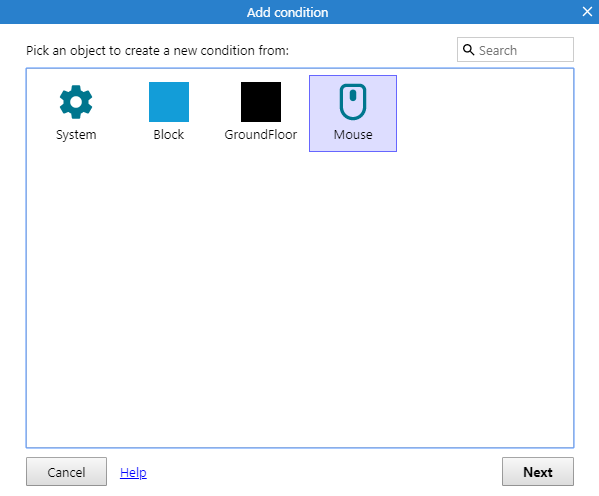
Click the Mouse object, then click Next.
You can now see a list of all Mouse-related Conditions we have to work with. There are plenty to choose from, but the one we want is conveniently highlighted for us: On click.
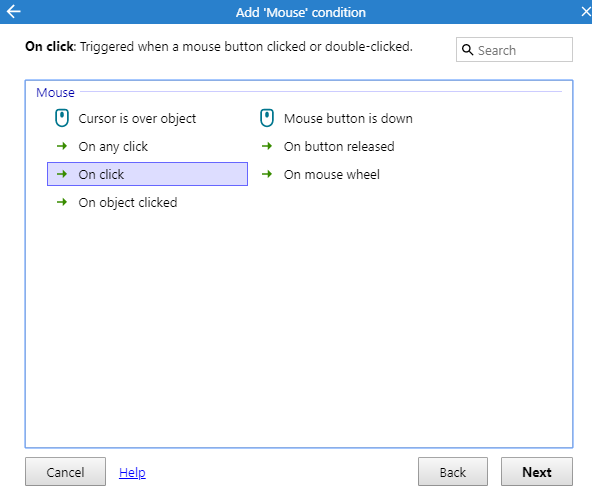
As you can see from the description at the top of the window, On click is a Condition that happens if "a mouse button [is] clicked or double-clicked". Sounds like what we want. Click Next. It will then ask which mouse button to check and what type of click (single or double). Just leave it at the default (Left, Clicked) and click Done.
Cool, we've added our first condition! Now to add the action.
In the space directly to the right of where it says On Left button Clicked, click the Add action link. A very familiar-looking window will appear...
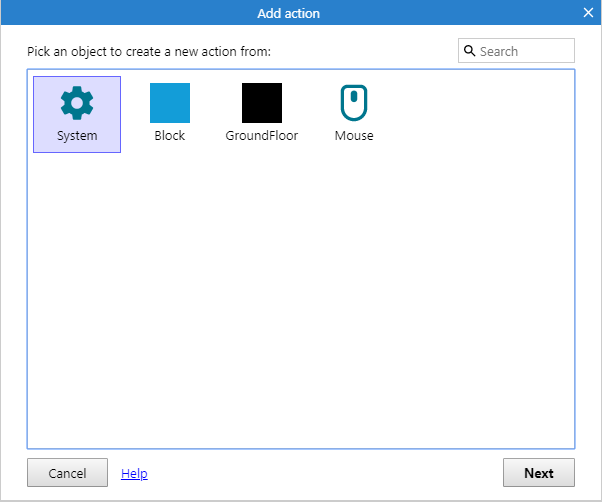
Keep in mind, though, this time we're selecting which object we want to make an Action for, not a Condition! The Action we seek is in the System object, so click that and then click Next.
There are a lot of Actions to choose from, but keep in mind what we're looking for: an Action that creates an object. Hmm... how about Create object?
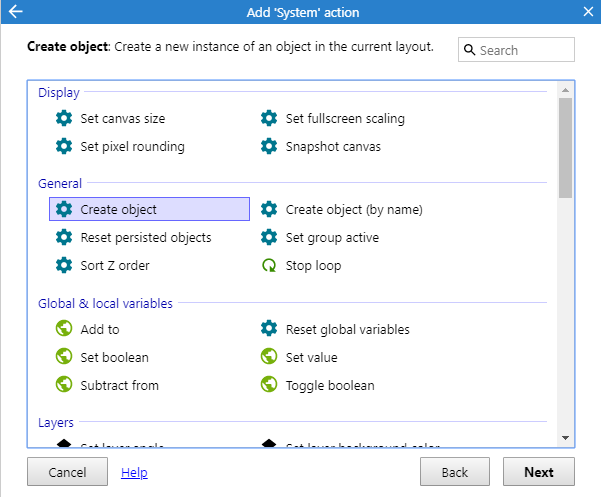
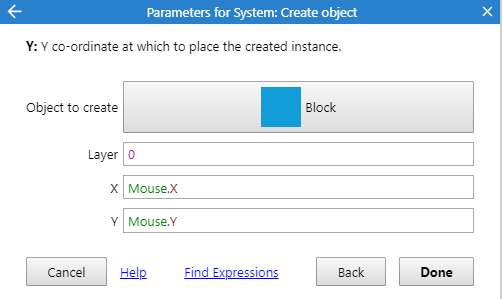
Select Create object and click Next. The next window asks us what kind of object we want to create, and where to create it. We want to create a Block on Layer 0 (the default layer) at the X coordinate of the mouse and the Y coordinate of the mouse.
Selecting the object is easy -- click the click to choose button and select our Block. It's a little more tricky to get the position of the mouse. We have to use something called an expression, which is a tiny bit of typed-out code. In this case, we'll want to use the Mouse.X expression for X and the Mouse.Y expression for Y.
Once you fill in that information, you should have the following:
Click Done. Congratulations, you just finished your first Event!
Save and run your game to see if it works! Try clicking in various places in the game window. What happens if you click where a block already is? Experiment! Go crazy!
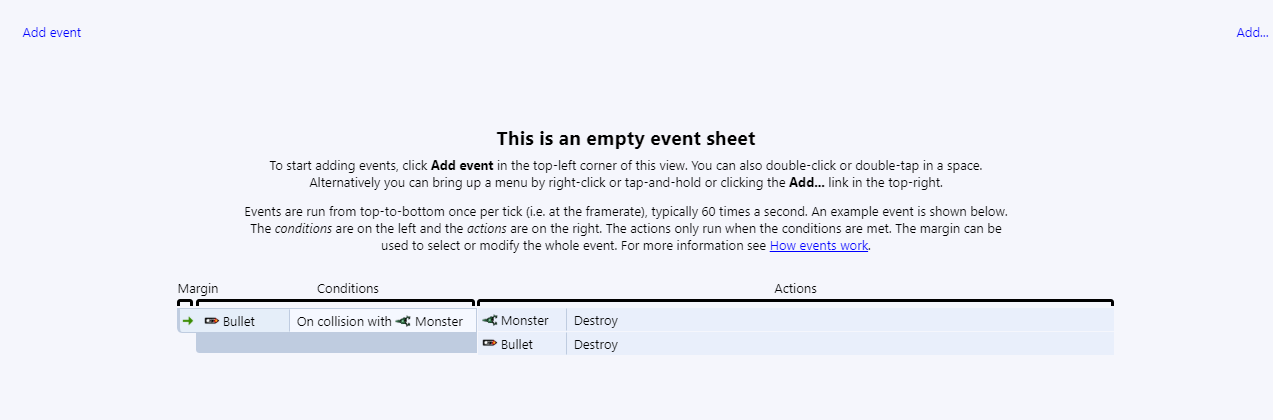
Step 9: Removing Blocks with Right-Click
So we can now build structures with our blocks, but we still need a way to destroy them. Let's make a new Event, similar to what we did before. This time will be a little bit different, though, because we actually need two Conditions: "If the user is pressing the right mouse button" and "If the cursor is hovering over a Block". We'll still just need one Action, though: "Destroy the block at the mouse position". (It's very common in Construct to have multiple Conditions and/or Actions in a single Event.)
Back in your Event Sheet, click Add Event beneath our existing Event:
Again, click the Mouse object and click Next. Now select the Mouse button is down Condition.
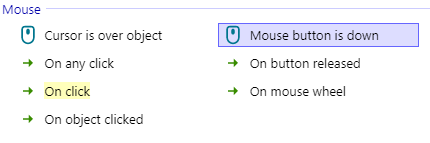
(This works differently from On press, because it means that as long as we're holding the right mouse button, any block underneath will be deleted, even if we move our mouse cursor around. If we used On press we'd have to right-click each block individually to delete it, which is kind of tedious. You're welcome to try it out if you want, though!)
Click Next. A new window will appear. Select the Right mouse button, then click Done.
All right, one Condition down, one to go. To add another Condition, right-click the Condition we just added, then click Add another condition.
In the new window, select the Mouse object again. This time we want the Cursor is over object Condition. Click Next, then choose our Block for the Object field.
Click Done. Your event should now look like this:

(Notice that both Conditions are in a single Event -- that's very important!)
It's finally time to add our Action. Click Add action just to the right of our Event, and choose the Block object. Scroll down to near the middle of the list of Actions and choose Destroy.
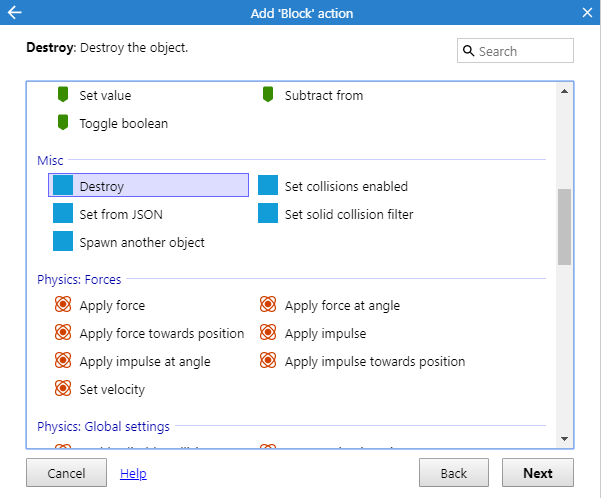
Click Next, and that's it! Save and run your game. You should be able to right-click blocks to destroy them. Try building a tower and then destroying its bottom blocks. Watch it crumble!
Step 10: Randomizing Colors
We're almost finished with our game, but it's still missing something: visual variety! All the blocks look the same. Wouldn't it be more fun if each block was a different color, picked at random?
To make that possible, we need to first open our Block sprite in the Animations Editor. In the Project menu (upper righthand side of the screen), double-click the Block object. This will open it up for editing.
We want to replace the color of the sprite with pure white. You can select this color by manually typing 255 in the Red, Green, and Blue fields in the bottom-left of the window, like so:
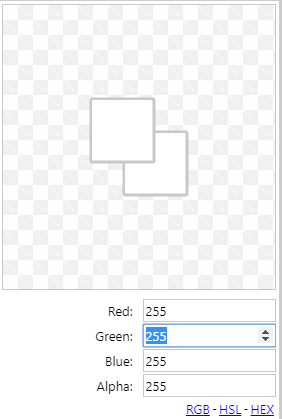
Once you've done that, select the Fill tool and click in the square to repaint the image. It should be entirely white now.
The reason we need it to be white is because of how Construct 3 blends colors. We're going to program the game to set the color of the block image to some random combination of red, green, and blue. Making it white to start with means that all possible blends will look as they should, instead of just slightly darker versions of your original color.
Go ahead and click the X button in the top-right of the window to exit the Animations Editor. Return to Event sheet 1.
Next, we'll need to add a new event. (You should know how to do that by now.) This event will take the form: "If a block was just created, then change its color to a random color."
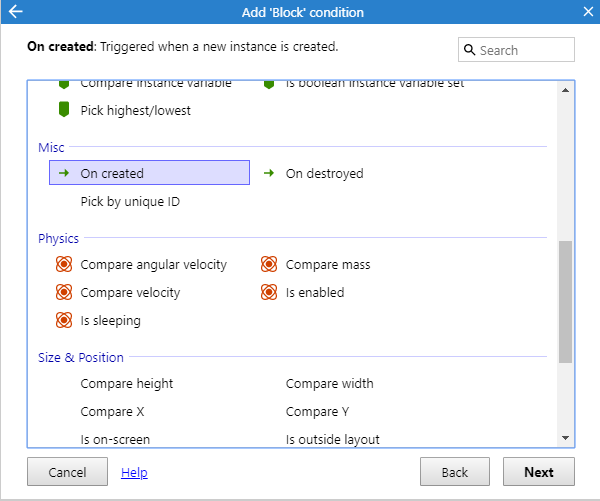
Select the Block as the object from which to make the Condition. Select the On created Condition, then click Next.
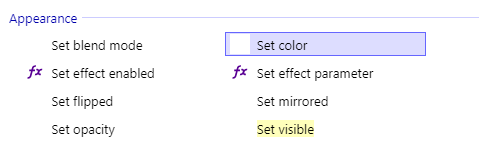
No options or fields to fill out for this Condition; it's nice and simple. Now add an Action for this Condition, and select the Block as the object. On the next screen, choose Set color for the Action.
Finally, the game wants to know what color we want to change the block to. This field is an expression (remember those?), and furthermore, it's a function call. If you've ever used another programming language (or have had functions in math class), you should be familiar with functions. If not, don't worry about it for now, just enter the following:
rgbEx(random(10, 90), random(10, 90), random(10, 90))
This generates a color (that's the rgbEx part) where the red, green, and blue values are all randomly chosen from 10% - 90% of the full color's intensity. This makes it so the blocks have colors that aren't too dark or too bright.
Click Done, and try out your game. Each block should be wonderfully unique!
Step 11: Move on!
Congratulations on the creation of your block stacking game! We've just barely scratched the surface of what Construct 3 (and you) can do. Now it's up to you to continue learning. If you'd like, you could try modifying our game to include the following features:
- Change the design of the blocks. Instead of solid colors, draw shapes and patterns on the blocks. (Maybe even randomize the patterns!)
- Change the physical shape of the blocks from rectangles to triangles. This is a bit challenging but very interesting to play with! (HINT: In the Construct 3 manual, look up
collision polygons.) - Make the game work with a touch screen so the player can tap to create blocks.
- Whatever else you can think of! Express your creativity!
Once you've modified this game to your liking, feel free to explore other tutorials or just dive into Construct and make games using your own ideas. Best of luck, and have fun!